Showing posts with label Projects. Show all posts

Wednesday, December 2, 2009

A DIY Christmas Wreath

You might have come across some DIY Christmas wreaths being done all over blog land. One of the easiest tutorials I found on how to make your own Christmas wreath was over at Eddie Ross where this one was made. Just beautiful! Thrifty Decor Chic got inspired to do one of her own as well. A lovely match to her chic and lovely dining room!

My Christmas colors this year are gold with red accents. So I headed over to Walmart to buy an assortment of gold ornaments. I got a box of 24 ornaments for only $4!

Here is my lovely gold wreath.


Here is how I did it. I basically followed the Eddie Ross tutorial.

Step 1: Find yourself a wire hanger in your closet, gather (buy) some ornaments and a pretty ribbon.

Step 2: Shape your wire hanger into a circle and undo the end.


Step 3: Begin by threading the ornaments on the wire hanger.


Step 4: Once you have all your ornaments threaded through the wire hanger, you can close the ends. You will need pliers or scissors to do this. Snip off the extra wire with scissors.

Step 5: Hang your wreath with a pretty ribbon. I hung my wreath using a 3M hook.

Easy and lovely! I made two of these for two of my windows in my family room and now I am itching to make more. Maybe a pretty pink one for the Little Miss :)

Saturday, November 28, 2009

The Thanksgiving Table

It was my first time hosting Thanksgiving this year. We were only having my parents and sister over, so very low-key no pressure. But I still wanted the table to be festive - without spending a penny. Very doable with these two ideas!

First, I had seen the cutest Thanksgiving place cards over on Kimba's DIY Day. Turley Times made these adorable place cards for Thanksgiving and I knew I had to recreate (a.k.a copy!).

These were so easy to make. Turley Times did a great job on the step-by-step. I basically followed it but skipped the leaves (just because I didn't have them and was too lazy to get them). Here is my version:


Cost for this project: $0.00. I had the ribbon, vellum paper, card stock, pine cones and of course a printer.

Next, the Thanksgiving centerpiece. Again, this was super easy to make and costed $0.00! Here is what you will need:

1. Drinking Glasses
2. Beans, lentils, any dried food
3. Card stock paper
4. Tree branches
5. Ribbon
6. Vellum paper
7. Printer
8. Hole puncher

Here is what I did. I printed my Thanksgiving message (THANKS) on vellum paper. I cut circles of card stock paper a little bigger than the vellum paper. I hole punched both vellum paper and card stock and tied a ribbon through to attach them together.

I picked out some tree branches and tied the tags to them. I filled my drinking glasses with bird food (yes, bird food - I had no other dried food!). I cut out circles of card stock and placed them over the bird food - just so that we don't smell it! Hehe, so obviously this step is optional :)


I then stuck the branches through the card stock and the bird food - and voila! One of the easiest projects ever!

And here is the low-key and extremely casual (and cheap!) Thanksgiving table.

Love it!

Saturday, August 29, 2009

"No Soliciting" Sign

Linking to Kimba's DIY

---------------------------------------------------
I can't take credit for this idea as I have seen it somewhere in blog land but can't remember for the life of me whose idea it was. Please let me know if it is yours so I can give you credit :)
320 Sycamore made this cute one for her kitchen:

I remember seeing a "No Soliciting" sign with the same idea.
Here is my version and a step-by-step tutorial of how I transformed this:

into this:

Step 1: Choose your frame. I liked the design on this one and also the fact that it was bare wood and ready to be used. I got this particular frame from Walmart. But you can use any frame, in any shape, in any condition for this super easy project.
Step 2: I took it apart and sanded very lightly.

Step 3: And, you guessed it, Heirloom White Spray Paint comes next. I actually ran out as I was spray painting but it ended up being a blessing in disguise. I liked the fact that it was not a perfect coverage and some of the wood showed through.

Step 4: While the frame was drying, I painted the glass portion of the frame with chalkboard paint.


Step 5: Once everything was dry and ready, I used a piece of leftover jute rope (couldn't find anything else at that moment) and hung it on my front door. Ta da!

And as the seasons change, so will the messages...but for now, it is a message for the solicitors :)

Now go visit 320 Sycamore for more great chalkboard ideas!

Friday, July 24, 2009

Quick and Simple - Glass Jars


So I was itching for a quickie project because God knows the big projects will take FOREVER to finish and I need a "quick fix" of accomplishment.

As I was about to throw away these glass jars, I heard them cry out to me (insert drama here). "Don't throw us away! You can doll us up and use us again." Hmmm, am I really getting to a point where glass jars are speaking to me?

So I listened to the glass jars, and took their caps to some black spray paint.

I hot-glued some leftover ribbon from another project on the jars

Then I chose a font I like, and printed out labels on cardstock paper (I chose white and brown here to match the ribbon)

And then ugly glass jar, became a pretty-cutey


And the best part of it all, they stopped speaking to me! Don't they look so cute and cozy in this romantic corner in my kitchen? I love them!

Thursday, July 9, 2009

Remember...

I call this post "Remember..." since I have started several projects around the house and I am ever-so-slowly doing one thing for each project, here and there. I wanted to show you some progress on some of them.

Remember our basement bathroom remodel? Well, the colors of this decorative pillow really appealed to me so I decided to do a burst of some of these bright colors here and there. I haven't done any of that yet, but I thought to show you the pillow anyways because I think it's just so purdy!

I also decided to switch out the light green bath rug with this brown and beige one.

I still have to put my cream shower curtain here to finish the look.

Remember the light fixture that I purchased? Well it finally went up and made it itself a home to complete the vanity. What do you think?


Remember my great thrift store find, the three black press chairs? Well two of them are sitting pretty in my sunroom...for now at least.

We never got around to finishing painting the sunroom so hence the two random colors.

Moving on...

To the exterior of the house. Our front door looked really worn out and bland. It was a faded color of teal green and not to my liking. So we found some brick red exterior paint and voila. Much better and brighter.

(Side project - still need to spray paint all the gold fixtures and door handles)

And since we are outside, here is my little front porch. It's still a long ways to go before coziness and ice cold lemonades

Wednesday, June 17, 2009

I made me a topiary!

I finished my third diy decor on my project list. Remember when I said one project a month? Yeah, right! I am already itching for the next project!

So to recap, here is Kara's version of the topiary: Here is Melissa's version of the topiary:
And here is my version of the topiary:
What do you think? This was super easy! You can get decorations on how to make your own from either Kara's post or Melissa's post or see my directions below.

I actually didn't need to use hot glue as I used the ends of the stem of my fake greenery to puncture the Styrofoam ball.

Materials:
1. Two 6 inch green Styrofoam balls from Michaels. Each one was $4.99 and got to use my 50% off coupon
2. Greenery I already had
3. Planter I already had
4. Spray paint I already had
5. Tree branch - I already had :)
6. Bag of moss ($1 from the Dollar Store)
Total: $8.48!


Directions:
1. I spray painted my planter. It was a light oak color and decided to spray paint it espresso
2. I worked my way around the green Styrofoam with the fake greenery
3. I filled the planter with another Styrofoam ball and covered the top with moss
4. I got a tree branch from my yard, plopped the topiary on it and then stuck it through the base Styrofoam ball inside the planter, and done!

Seriously, this was super easy and idiot proof for people like yours truly. And most importantly, super cheap. So go make yourself a topiary!

Friday, June 5, 2009

My Version of the Jute Wreath

So, I finally got done with one of my projects on my project list. What do you all think? I might change up the hanging ribbon to a lighter shade or try out the burlap like Kimba had on hers.

If you want directions on how to make one (and it's so easy!), Kimba has a tutorial on her blog.

Friday, May 29, 2009

My Project List

I have found some great ideas for DIY decor from all these wonderful blog ladies. I think I will limit myself to one project a month for now so I don't overwhelm myself! I want to do every one of these and more!
A topiary by Kara:

Michelle's chalkboard:

Cabinet Door Makeover by 320 Sycamore's sister:

Frame Display (keys or any other sentimental item) by 320 Sycamore:

Photo Display by Kimba:

I also did my version of the Jute Vase and took the idea from Kimba - here is hers:

These are the projects that I am hoping to tackle and share with you once they are done. They seem fairly easy but you never know, a designer wanna-be like myself can mess anything up! Hmm, I am thinking I will start with the Chalkboard Frame =)

Tuesday, May 19, 2009

My First Major Do-It-Yourself Remodel

The idea of remodeling anything scares me because I am no professional. But, who can seriously afford dropping thousands of dollars on remodeling right now? So the wheels in my head started turning and I began reading up on do-it-yourself projects - the cheapest way to go.
First, I found this great idea on Thrifty Decor Chick's blog. She is awesome! Seriously, she has so many great decor ideas and shows you how to do them, while all at the same time saving some serious cash!
Anyways, I had so many empty glass vases - and had no idea what to do with them. So I grabbed one, a glue gun, and jute rope.
 

Two hours later, I got this! What do you think?
 
This was a practice one but I am still so very proud of my first DIY project:)I am doing several more of these with different sized vases to create an arrangement - for my new bathroom :)
Okay, so on to the big DYI project - the UGLY BLAND BASEMENT BATHROOM!
Something came over me - I had to change this bathroom. It is white, boring, ugly ugly cabinetry - just blah! But again, not much cash to drop on a huge remodel so I had to get a little creative. And thanks to the world of blogging, you can find great ideas on just about anything!
So I made a trip to Lowes (scary thought), picked out paint color for the walls, spray paint and spray paint primer for the cabinets. Painting cabinets = SAND, PRIME, PAINT. This is what the blog world taught me :) And here we go:
This is the bathroom before. Horrific, look away, look away!
 

I started by removing all the hardware (fixtures and such) and removed the cabinets.
 

Next, after I cleaned the cabinets with soap and water, I sanded them down. This was my VERY FIRST time using a sander. I didn't even know what a sander was last week!

This picture shows the difference between the sanded-down door and the original.
Next, I primed the cabinets with spray paint primer. Since I was painting the cabinets a darker color, I got a gray tinted primer to hold the color well.
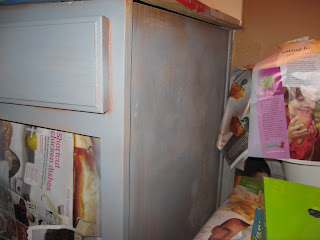

And here is the bathroom so far.

Compared to its horrific state before, I think it's looking great already! There is still a lot more work to be done - put last coat on the cabinets, install the cabinets, get new light fixtures, faucet, mirror, accessorize, etc. So stayed tuned for the big reveal!